Written By Sophanith Dith
Last Updated March 29, 2026
Applies to Microsoft Excel 365 (Windows only)
Part of the Beginner Learning Path
Module 1 Excel Fundamentals
Lesson 8 of 12
If you’re just starting your Excel journey, one of the most important concepts to understand is cells, rows, columns, and worksheets. These are the basic building blocks of every spreadsheet you will ever create.
Before you learn formulas, formatting, sorting, or charts, you must clearly understand how data is organized inside the Excel interface. If you are still getting familiar with the Ribbon, tabs, and toolbar, consider reviewing our beginner guide to understanding the Excel interface first. If this foundation isn’t clear, advanced features will quickly feel confusing. But once this structure becomes clear, Excel will start to feel logical and manageable.
In this lesson, you will learn what cells, rows, columns, and worksheets are, why they matter, and how to use them step by step. This is a core beginner skill, and mastering it early will make all future lessons easier.
Quick Answers:
Cells, rows, columns, and worksheets are the core structure of Excel. Rows run horizontally, columns run vertically, and cells are where they intersect to store data inside a worksheet.
Next, let’s begin with a quick overview before diving deeper.
Quick Reference
Before we explore each part in detail, here is a simple overview to help you understand the structure quickly.
Definition (Simple Explanation):
Cells, rows, columns, and worksheets form the grid system that Excel uses to organize data.
Purpose:
They help you structure information clearly so it can be calculated, analyzed, and formatted correctly.
Where to Find Them in Excel:
- Cells: The individual boxes inside the worksheet grid where you enter data.
- Rows: Run horizontally across the worksheet and are identified by numbers on the left side (1, 2, 3…).
- Columns: Run vertically down the worksheet and are identified by letters at the top (A, B, C…).
- Worksheets: Located as tabs at the bottom of the Excel window (for example, Sheet1, Sheet2).
Now that you have a quick overview, let’s explore each element in more detail. We’ll begin with the largest structure in Excel and gradually move toward the smallest building block.
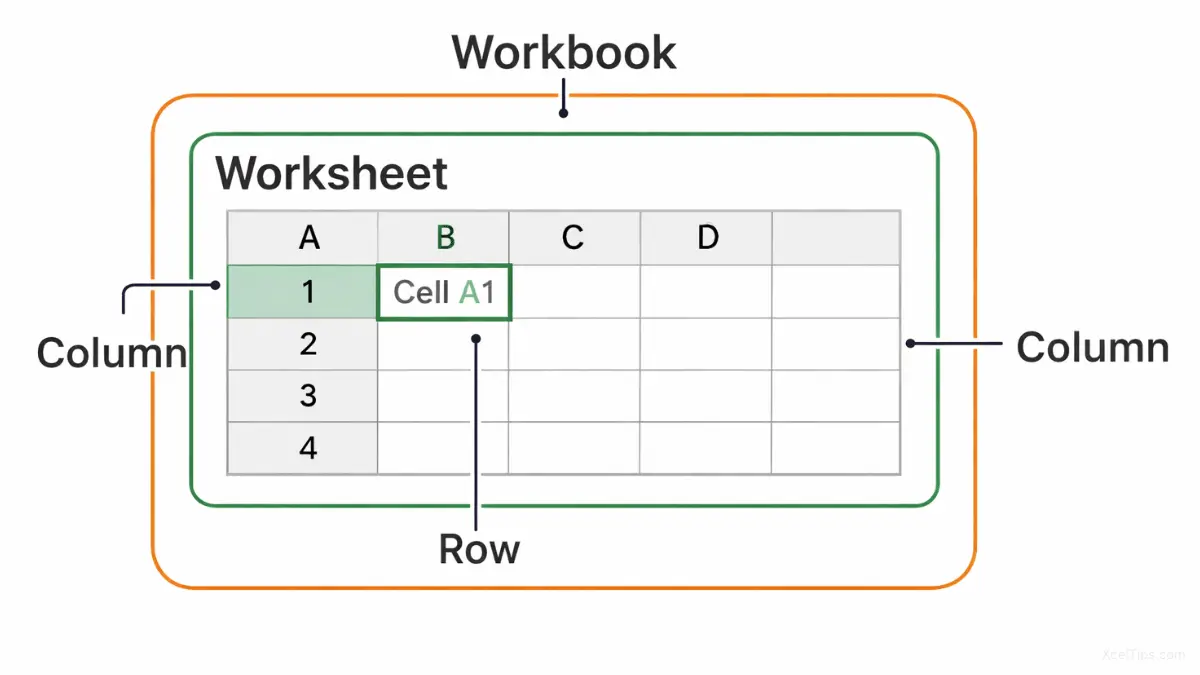
What are Cells, Rows, Columns, and Worksheets in Excel?
To fully understand Excel’s structure, it helps to see how these elements connect.
Rows run horizontally across the worksheet, and columns run vertically down it. Where a row and a column meet, a cell is created. A worksheet contains thousands of these rows and columns arranged in a grid.
Everything you do in Excel — from entering data to creating formulas — happens within these structures.
Once this structure becomes familiar, learning formulas and formatting will feel much easier. Let’s start from the largest structure and move inward.
Understanding a Worksheet in Excel
Now let’s begin with the biggest container in Excel: the worksheet.
What Is a Worksheet in Excel?
A worksheet is a single spreadsheet page inside a workbook. When you open a new Excel file, you are automatically placed inside one worksheet.
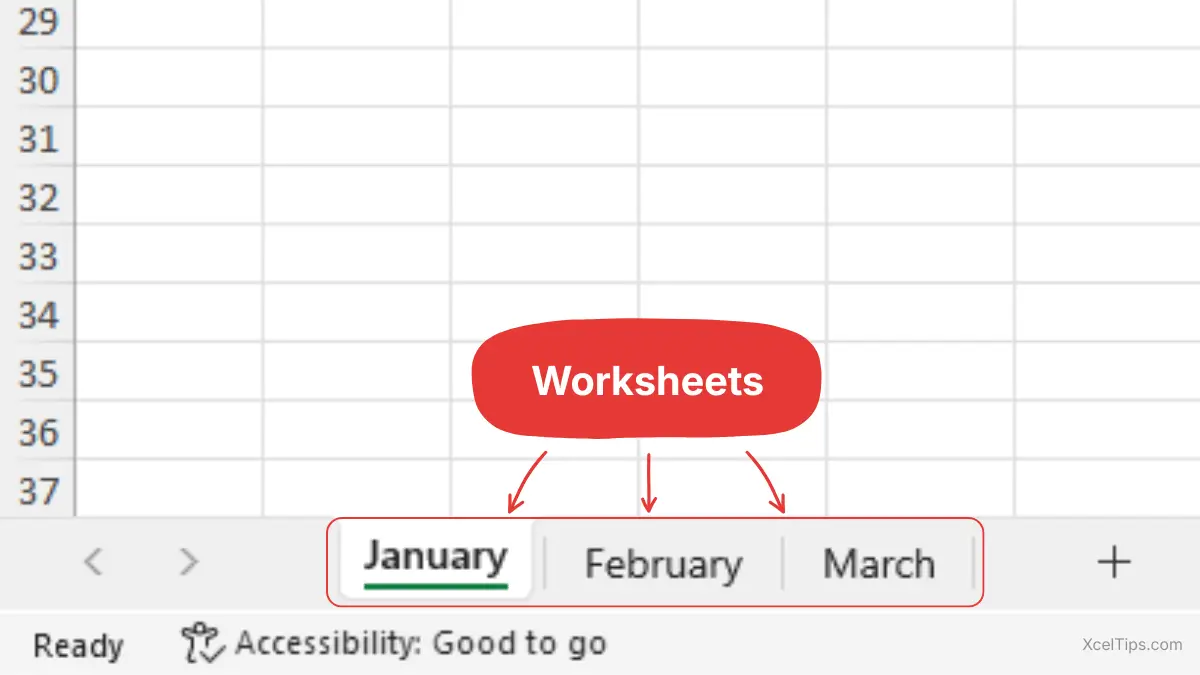
At the bottom of the Excel window, you will see tabs such as: Sheet1, Sheet2, Sheet3.
Each tab represents a separate worksheet.
Why Worksheets Matter
Worksheets help you organize different sets of data inside one file. Instead of mixing everything together, you can separate information logically.
For example:
- Sheet1 =
January - Sheet2 =
February - Sheet3 =
March
This structure keeps your data clean and easy to manage.
To keep those worksheet tabs organized as your file grows, learn how to rename a sheet in Excel and move it step by step.
How to Work With Worksheets
Before working with multiple sheets, let’s practice the basics.
Rename a Worksheet
Renaming worksheets helps avoid confusion later. To do this:
- Right-click on Sheet1 at the bottom.
- Click Rename.
- Type:
January. - Press Enter.
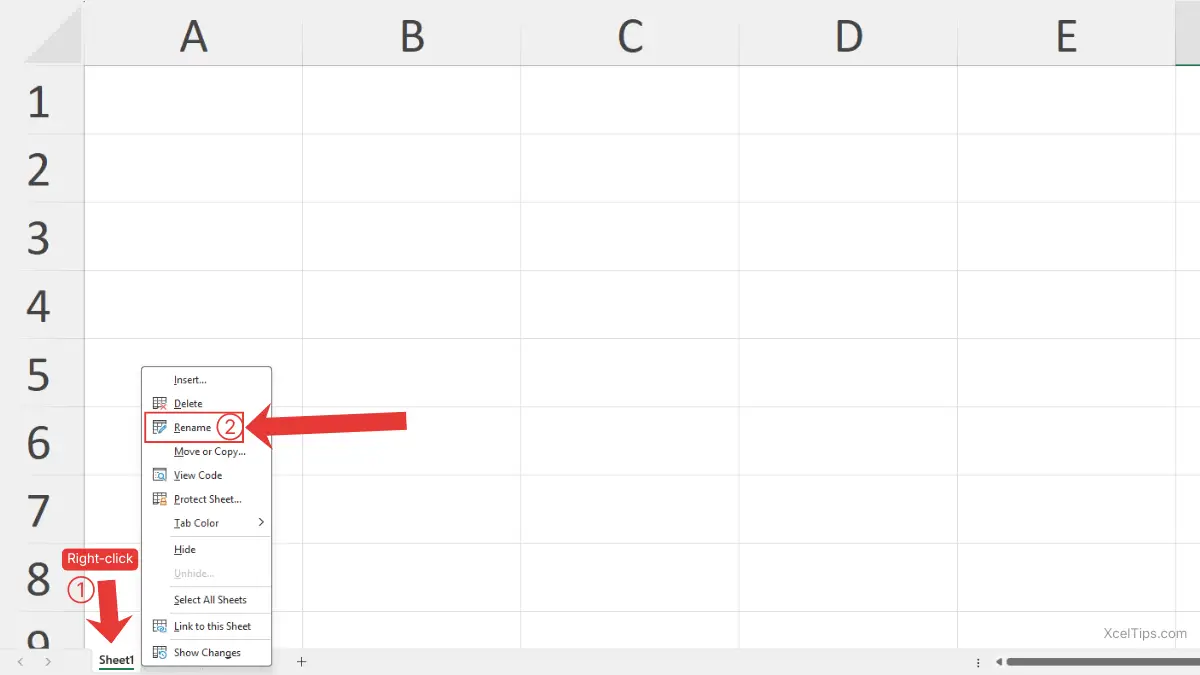
Beginner Warning:
Be careful not to click Delete instead of Rename.
Pro Tip:
Always rename worksheets as soon as you create them. It prevents confusion once your workbook grows larger.
Add a New Worksheet
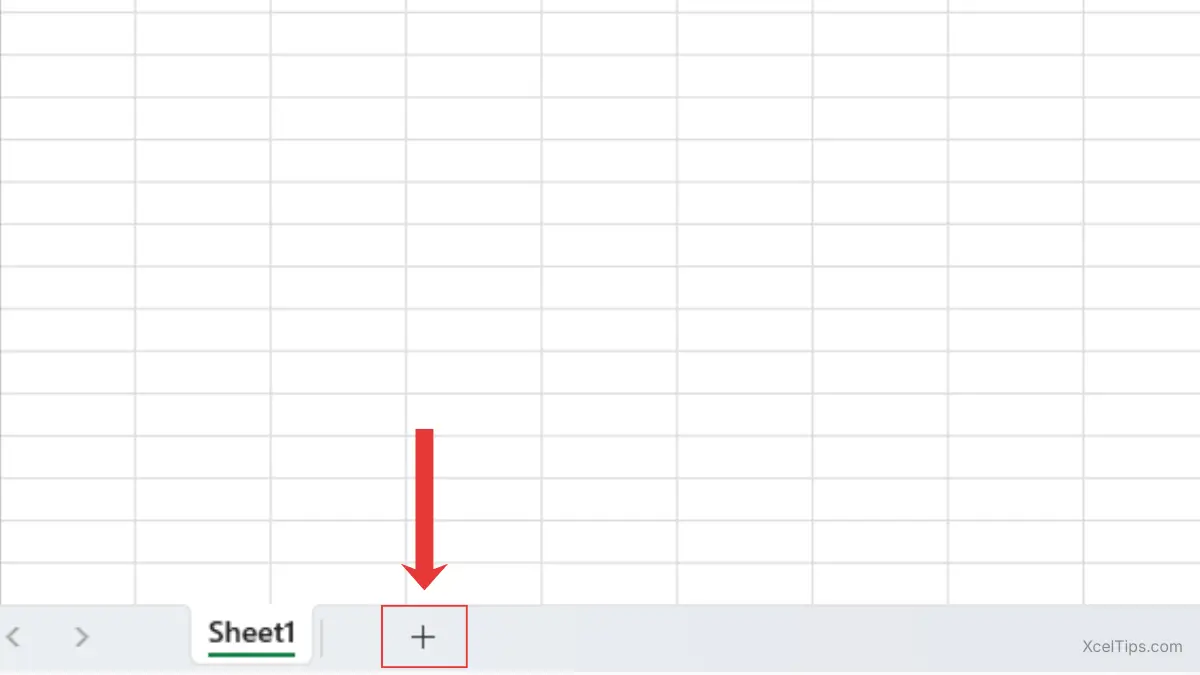
Once your first sheet is renamed, you may want to add another.
- Click the + (plus icon) next to the sheet tabs.
A new worksheet appears instantly.
When you’re ready to manage sheets more fully, this guide shows how to add, duplicate, and delete a sheet in Excel.
Switch Between Worksheets
To move between worksheets:
- Click on any sheet tab at the bottom.
Excel switches immediately.
Common Beginner Mistakes with Worksheets
Before moving forward, here are mistakes beginners often make:
- Putting all data into one worksheet.
- Forgetting to rename sheets.
- Accidentally deleting a worksheet.
Now that you understand how worksheets organize your data, let’s look at how that data is structured inside the sheet—starting with rows.
Understanding Rows in Excel
Now we’ll move horizontally across the worksheet.
What Is an Excel Row?
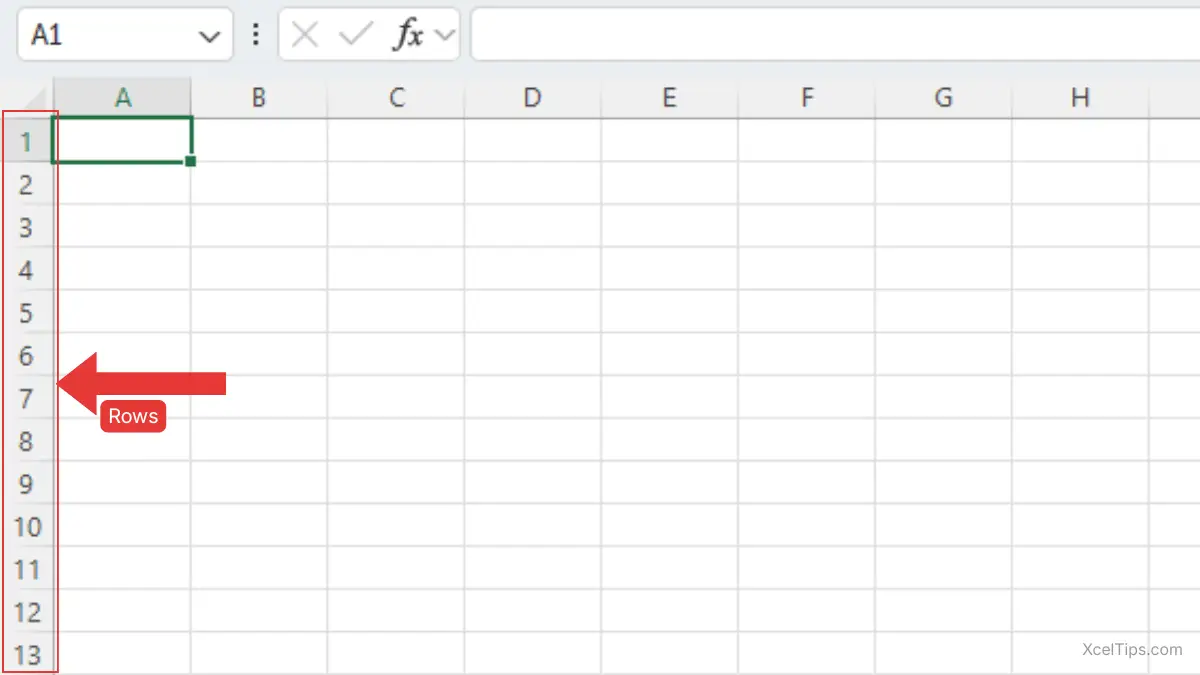
A row is a horizontal line of cells. Rows are labeled with numbers on the left side:
- 1
- 2
- 3
- 4
Each number represents one full row. For example:
- Row 1 includes
A1,B1,C1 - Row 2 includes
A2,B2,C2
In Excel 365, each worksheet contains 1,048,576 rows, numbered from 1 at the top to 1,048,576 at the bottom.
Why Rows Matter
Rows usually represent individual records. For example, in a simple expense tracker:
| Date | Category | Amount |
|---|---|---|
| Jan 1, 2026 | Food | 25.00 |
| Jan 2, 2026 | Transport | 10.00 |
Each horizontal line represents one transaction.
When you need to work with several records at once, learn how to select multiple rows in Excel the right way.
How to Select and Format Excel Rows
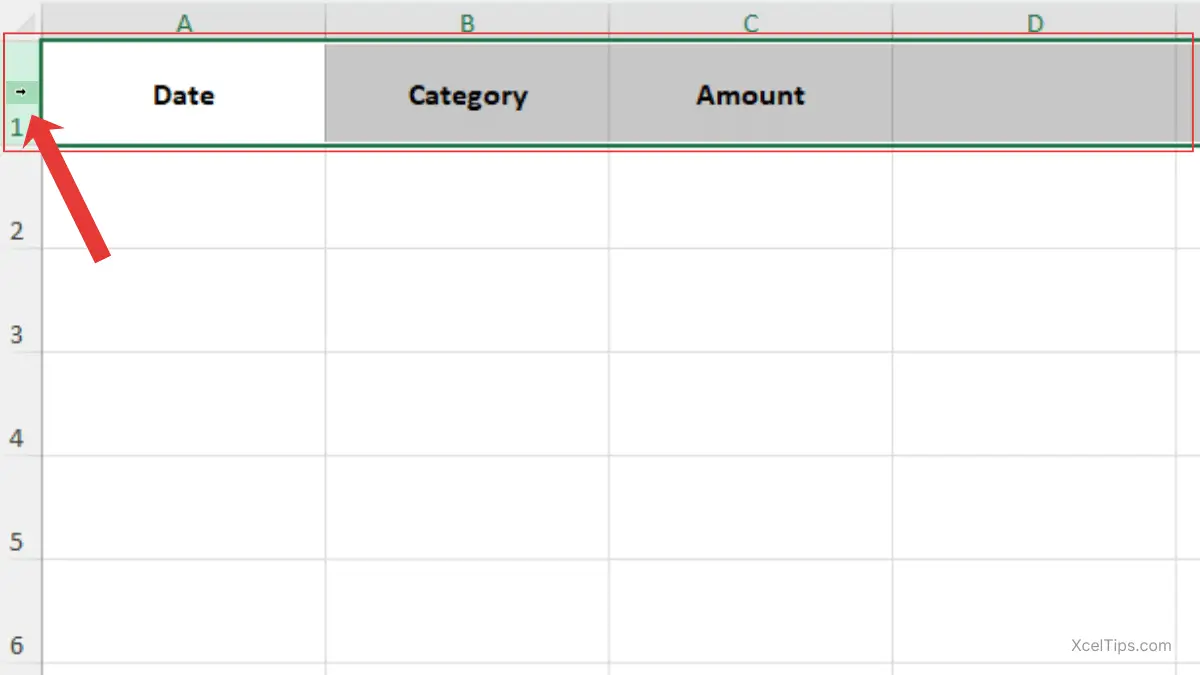
Now let’s practice working with a full row by creating a simple header row and formatting it so your table is easy to read.
- Click the row number 1 on the left side of the worksheet.
- After selecting row number 1, click inside cell
A1to begin typing. - Type
Datein cellA1. - Type
Categoryin cellB1. - Type
Amountin cellC1.
Important:
After typing in A1, continue typing in B1 and C1 without clicking outside row 1 so the entire row remains selected for formatting.
At this point, you have a basic header row. Next, let’s format it so it stands out from the rest of your data.
- Make sure row number 1 is still selected.
- Go to Home tab → Font group → Bold command.
Your header row now stands out clearly, which makes your worksheet easier to scan and understand.
Best Practice:
Use row 1 for headers in most Excel tables. This keeps your data structured and easier to filter later.
Common Beginner Mistakes with Rows
There are some common mistakes when working with rows:
- Deleting entire rows accidentally.
- Confusing row numbers with cell references.
- Selecting whole rows when only one cell is needed.
After understanding how rows organize data horizontally, let’s look at how columns structure it vertically.
Understanding Columns in Excel
Columns organize data vertically.
What Is an Excel Column?
A column is a vertical line of cells labeled with letters at the top:
- A
- B
- C
- D
Each letter represents one full column that runs from the top of the worksheet to the bottom. For example:
- Column A contains
A1,A2,A3. - Column B contains
B1,B2,B3.

Why Columns Matter
Columns usually represent categories of information. For example:
- Column A =
Date - Column B =
Product Name - Column C =
Price
This structure keeps your spreadsheet organized and easy to read.
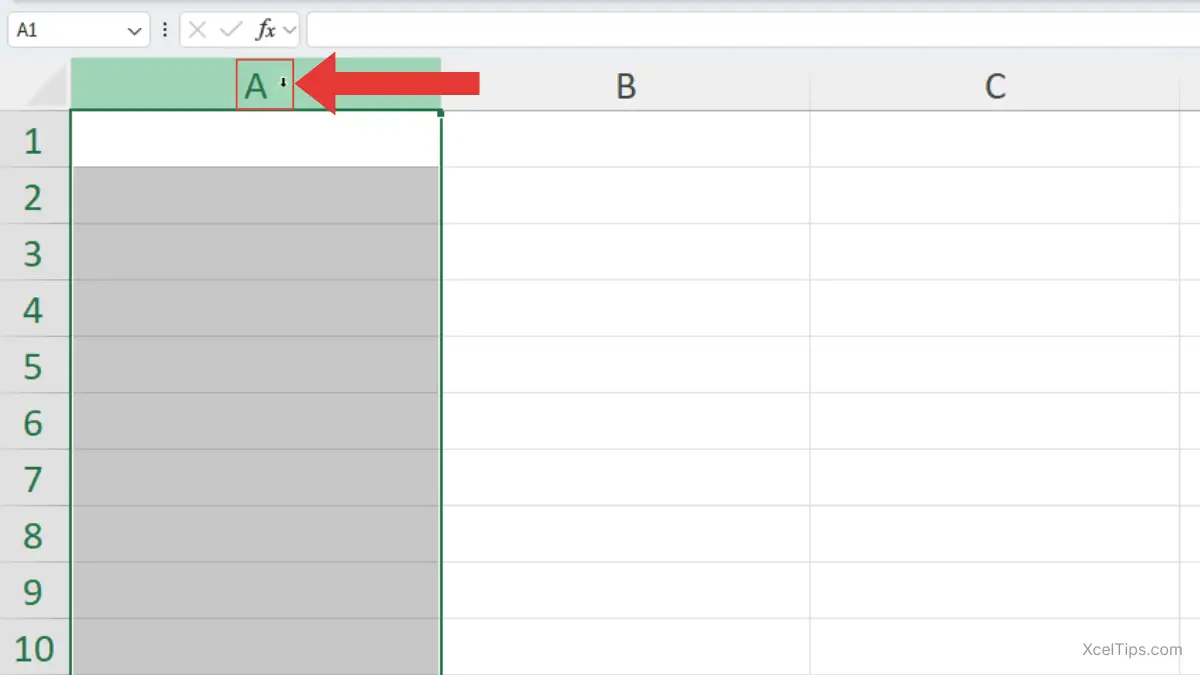
How to Select a Column
To select an entire column:
- Move your cursor to the top of the worksheet where the column letters appear (A, B, C…).
- When the cursor changes to a downward arrow, click the column letter (for example, A).
- The entire column will become highlighted.
Important:
Make sure you see the downward arrow before clicking. If you see the normal pointer, you may accidentally click inside a cell instead.
How to Resize a Column Automatically
Now let’s resize a column so the text fits properly inside the cells and is not cut off.
To resize a column automatically:
- Move your cursor to the boundary line between two column letters (for example, between
AandB) at the top of the worksheet. - When the double-arrow cursor appears, double-click.
- Excel automatically adjusts the column width to fit the longest content in that column.
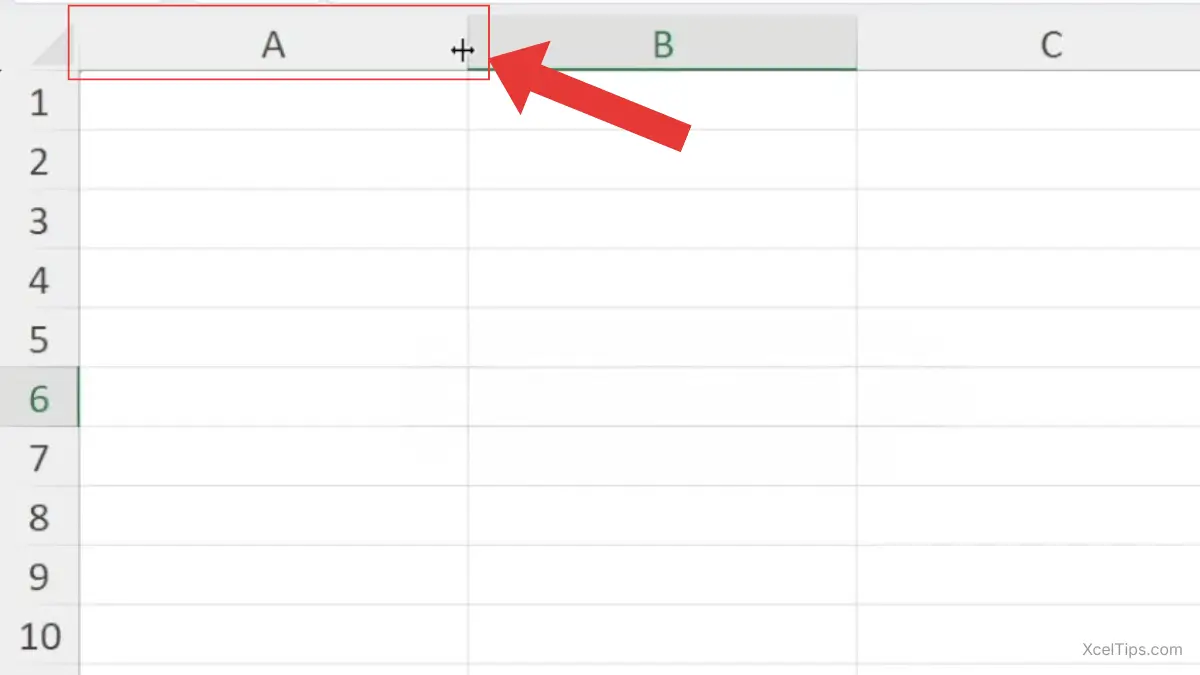
Important:
Double-click the boundary line between the column letters — not the column letter itself.
If you want more detailed guidance on adjusting column width or row height, Microsoft provides step-by-step instructions in their official guide on changing column width and row height.
Common Beginner Mistakes With Columns
When working with columns, beginners often make small mistakes that can cause confusion or formatting problems.
- Not adjusting width for long text.
- Entering data in the wrong column.
- Hiding information without realizing it.
Now that you’ve seen how rows and columns organize data, let’s focus on where they intersect — the cell.
Understanding a Cell in Excel
We now move to the smallest but most important unit in Excel: the cell.
What Is a Cell in Excel?
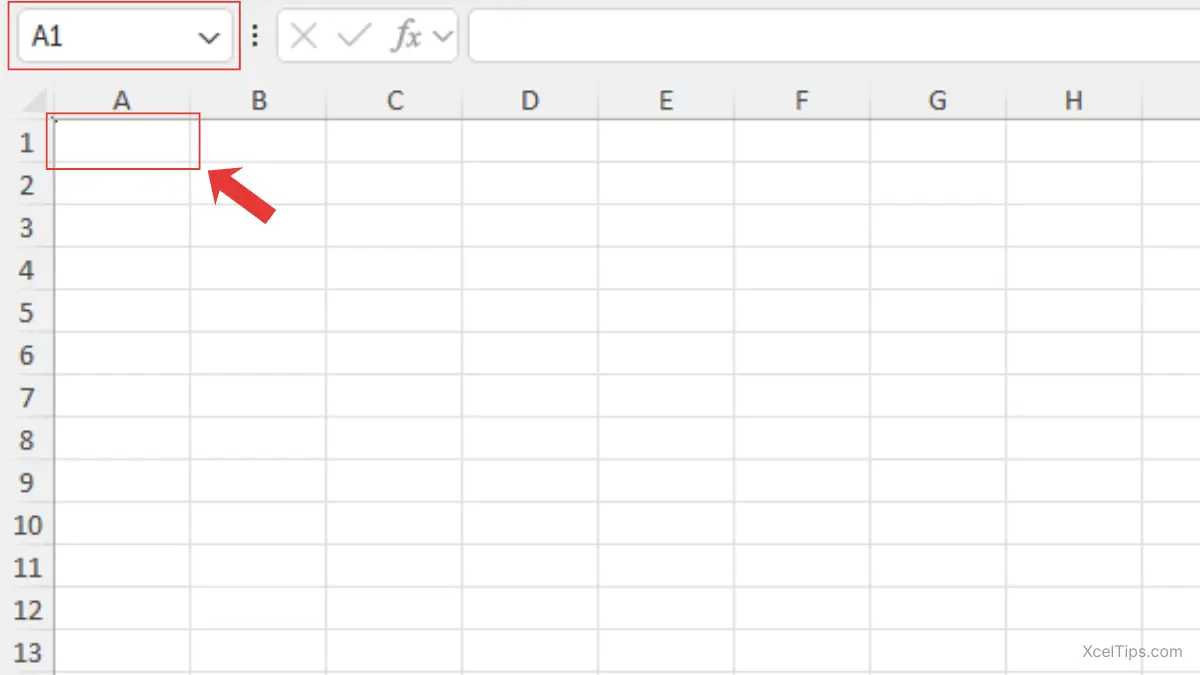
A cell is a single rectangular box where a row and a column meet. It is where you type data.
Beginner Tip:
Always check which cell is selected before typing. You can confirm this in the Name Box (for example, A1). This helps prevent entering data in the wrong location.
Each cell has a unique name called a cell reference. This reference is based on column letter and row number.
For example:
- Cell
A1=Column A+Row 1 - Cell
C5=Column C+Row 5
This naming system allows Excel to identify each cell uniquely.
Why Cells Matter
Cells are where all data lives. If you misunderstand cells, formulas will not make sense.
For example:
=A1+B1
This formula tells Excel to add the values in cell A1 and cell B1.
Without understanding cell references, you cannot use formulas correctly.
To build on this next, start with what is a formula in Excel for a beginner-friendly introduction.
What Can an Excel Cell Store?
Before using cells effectively, you must understand what type of data they can hold.
An Excel cell stores one piece of data at a time. This can include numbers, text, dates and times, formulas, logical values (TRUE/FALSE), or error values.
Images and charts are objects placed on the worksheet, not stored inside cells.
Let’s briefly understand each type.
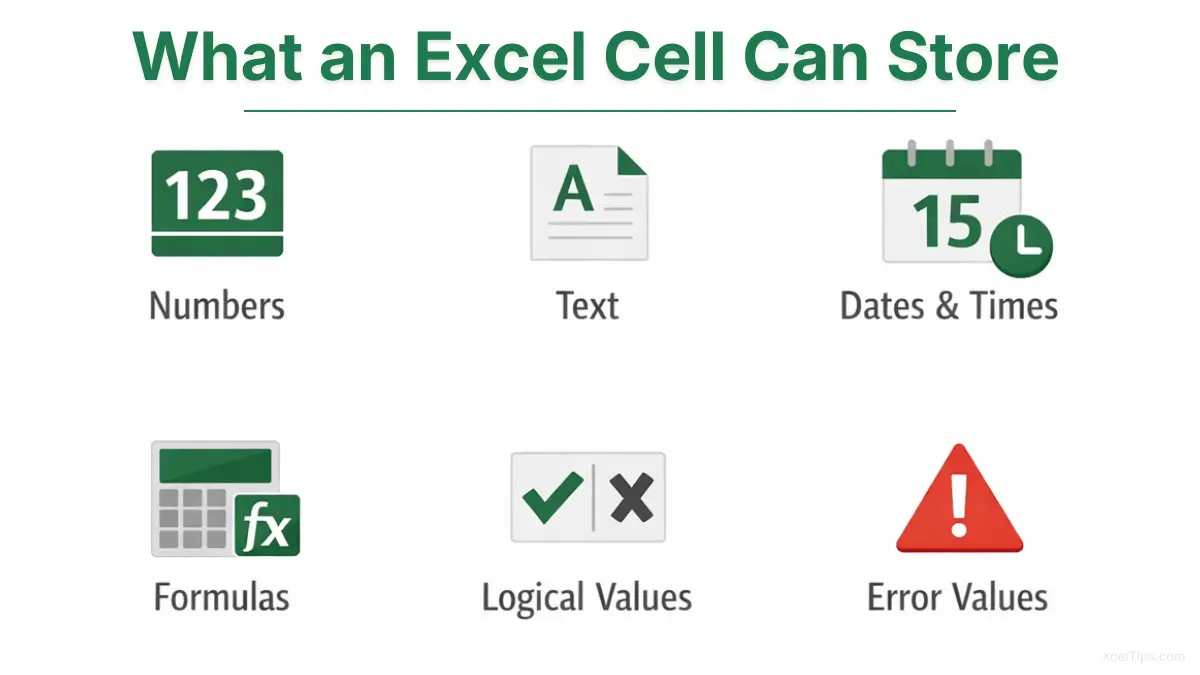
Numbers
In Excel, numbers can appear in different forms such as whole numbers, decimals, percentages, currency values, dates, and times, but Excel treats them all as numeric values. If Excel can calculate with it, it’s a number.
Text
Text in Excel refers to words or characters like Sophanith, XcelTips, or Cambodia,which help describe data but cannot be calculated. Even if text looks like a number, Excel treats it as text when it is stored as text and does not include it in calculations.
Dates and Times
Dates and times in Excel are used to record when something happens, such as deadlines or schedules, and Excel can calculate with them.
Although they look like dates or clock times, Excel stores them as numbers behind the scenes. For example, Excel can calculate how many days are between two dates.
Formulas
Formulas in Excel are instructions that tell Excel how to calculate or manipulate data and automatically update when the data changes. The cell stores the formula itself, while the displayed result is the calculated value.
Logical Values
Logical values in Excel represent “Yes” or “No” conditions, shown as “True” or “False”, and are commonly used in formulas to make decisions.
Error Values
Error values in Excel appear when something goes wrong in a calculation, helping users identify and fix problems in their formulas. Errors are still values in Excel and can be tested or handled using formulas like IFERROR.
How to Use Cells
Now let’s practice entering data into a cell. Follow these steps carefully:
- Click inside cell
A1. - Look at the Name Box (located to the left of the formula bar, above the column letters).
- Confirm it shows
A1. - Type
January Sales. - Press Enter.
Notice how the selection moves down to A2. This means Excel is ready for your next entry in the row below.
Common Beginner Mistakes With Cells
Before moving on, be aware of these common errors:
- Typing in the wrong cell.
- Not checking the Name Box.
- Confusing cell
A1with row 1 or column A. - Losing track after pressing Enter.
Understanding how to enter and reference data inside individual cells is essential. But cells do not exist on their own — they are part of a larger structure.
To fully understand Excel, you need to see how cells, rows, and columns work together.
How Cells, Rows, and Columns Work Together
A cell is created where a row and a column intersect. Rows run horizontally, columns run vertically, and together they form the grid that organizes all data in a worksheet.
For example:
- Column B + Row 3 = Cell
B3 - Column C + Row 7 = Cell
C7
This creates a coordinate system.
When you write:
=SUM(C2:C6)
You are telling Excel to add values in Column C from Row 2 to Row 6.
This concept directly supports what you will learn in the beginner lesson on Excel formulas, where you learned how formulas reference cells.
Now that the structure is clear, let’s reinforce it with practice.
Quick Practice
Let’s apply everything in a simple file.
- Open Excel and create a blank workbook.
- Rename the sheet to
Blog Posts. - In row 1, enter:
-
A1→ Excel TutorialsB1→ Excel TipsC1→ Excel FormulasD1→ Excel Templates
- Enter three rows of sample data.
- Bold the header row using Home tab → Font group → Bold command.
- AutoFit all columns.
- Save the file as:
XcelTips_Practice.xlsx
If you’re unsure how to save your workbook correctly, review our beginner guide on how to save an Excel file properly before continuing.
If you can complete this confidently, you now understand cells, rows, columns, and worksheets.
Before we finish, let’s briefly review the most important points from this lesson.
Key Takeaways
Here are the core ideas from this lesson:
- A worksheet contains rows and columns.
- Rows run horizontally.
- Columns run vertically.
- A cell is the intersection of a row and column.
- Every cell has a unique reference (like
A1).
Now that you’ve reviewed the key concepts, let’s answer a few common beginner questions.
Frequently Asked Questions (FAQs)
Here are some common questions beginners have when working with worksheets in Excel.
How many rows and columns are available in Excel?
Excel supports 1,048,576 rows and 16,384 columns, labeled from A to XFD.
What is the difference between a workbook and worksheet?
A workbook is the entire Excel file. A worksheet is one page inside that file.
Why are columns letters and rows numbers in Excel?
Excel uses letters for columns and numbers for rows to create a coordinate system, so each cell has a unique reference like A1.
Can I change or delete column letters or row numbers?
No. Column letters and row numbers are fixed in Excel and cannot be changed or deleted.
What happens if I delete a row or column?
When you delete a row, all rows below it automatically shift upward.
When you delete a column, all columns to the right automatically shift left to fill the space.
How do I know which cell I am currently using?
Check the Name Box — it shows the active cell reference (like A1).
What happens if I type in the wrong cell?
You can press Ctrl + Z to undo, or simply click the correct cell and re-enter your data.
Now that you’ve reviewed the most common questions, let’s quickly wrap up what you’ve learned.
Conclusion
Now that you understand how cells, rows, columns, and worksheets work together, you have a strong foundation for using Excel confidently.
Take a few minutes to open a blank workbook and recreate the examples from this lesson. Try building a simple table and practice entering data into different cells. The more you work with Excel’s structure, the more natural it will start to feel.
If anything is unclear, revisit the steps above and practice again. Repetition builds confidence—and that confidence will make learning formulas and more advanced features much easier.
This lesson is part of the Beginner Learning Path, a structured series designed to help you learn Microsoft Excel step by step from the basics.
← Previous Lesson
How to Use the Quick Access Toolbar in Excel (Beginner Guide)